Introduction to GitHub
Written by Thomas Tumiel
Why is this Important:
GitHub is a platform that allows you to share your Git repositories. It provides a central hub for others to download copies of your code and make contributions to it.Time to read: 20 minutes
After learning the basics of Git, you might be wondering what the point of it is. Well version control starts to make more sense when you begin working on large projects with multiple people. GitHub is just one place where you can store Git repositories for free so others can access them and contribute to your projects.
Sign Up
Go ahead and sign up for a GitHub account if you don’t have one already. There are several other platforms that you could use instead of GitHub but we’ll be sticking to GitHub in this tutorial.
Create a GitHub Repository
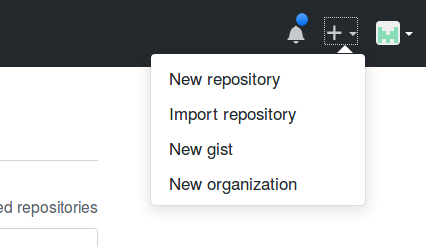
In the top right corner, you should see a + icon. Click that and then select “New repository”.
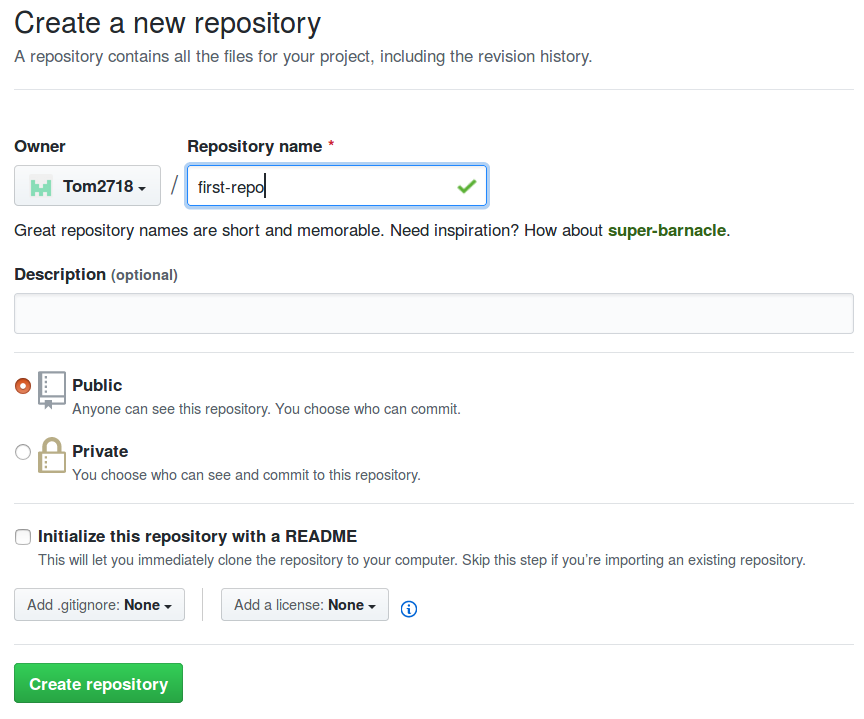
Here you can give your repository a name. It’s common to name your repository the same as the name of your project, in lower case and separated by hyphens. For now, you can call yours first-repo. Additionally, you can configure some other things like a description, setting the repo to private or initializing it with some files. For now we’ll ignore these.
Adding Files to Your Repo
You should be greeted with a bare repository which gives you some instructions on how to add things to your repo but most of it will look like another language for now so don’t worry about it.
In the previous tutorial, we created a Git repo on our local machine. Now head to that directory. It should look like this:
first-git-repo/
└── file.txt
Now we will push the local files on our computer to the Git repository. First you need to tell Git where to push your files to. In Git lingo, this is called a remote. First grab your remote url from your repo under the “Quick Setup” Heading:

Then add the remote url to your Git repository by typing the command below. Make sure that you change the url below to the url of your repo.
git remote add origin https://github.com/YOUR-USERNAME/first-repo.git
Now we can push our files to our repo. Simply type:
git push origin master
Note: you will need to log in to GitHub here.
The command git push tells Git to push the local files and changes to your remote repository on GitHub. The origin option tells Git which remote to push to. If you look at the previous command, you’ll see that we called our repo origin. The master option is known as a branch - simply put, a branch can contain different versions of the same project.
If you refresh your GitHub repo, you should see your file.txt in it.
Contributing to Other Repos
Great work! You’ve now learned how to push changes to your GitHub repo. As a short reminder, this is the general workflow:
# Make changes to files (for example file.txt)

# Stage to Git
git add file.txt

# Commit to Git
git commit -m "A message about the commit"

# Push to GitHub
git push origin master
To start working on someone elses repo you begin by “forking” it to your profile. Head to this repo and click the “fork” button in the top right:

Now you will see that GitHub has made a copy of the repo to your account. We will now “pull” that repo to your local computer so we can make changes to the files and then “push” them back to the remote repository.
To download the repo click on the “download or clone” button and copy the link:
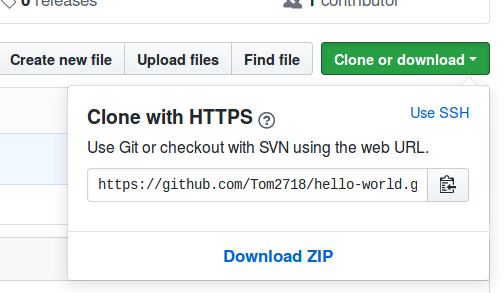
Now in a new terminal, run:
git clone https://github.com/YOUR-USERNAME/hello-world.git
git clone simply downloads the files to your machine using Git. Now change into the newly created hello-world directory. Inside you should see a file called README.md. Open this file. You can add your own username to the bottom of the list. Once you’ve done that, go through the process of committing and pushing your changes:
git add README.md
git commit -m "Added my username"
git push origin master
Make an Update to the Original Repo
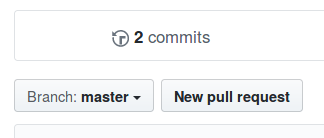
Great, we’ve made a change the the repo and updated it on your profile. But to collaborate with others we want to let them know about all the great changes we’ve made. To ask the original repo owner to merge your changes with their repo you can make a pull request. On GitHub, go to your profile and click “New Pull Request”:
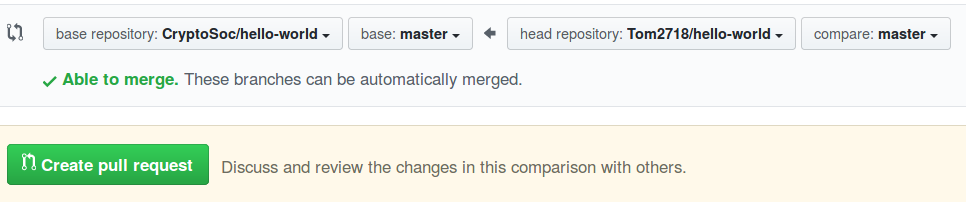
Now make sure we are merging our changes with theirs by making sure the CryptoSoc repo is the “base” and ours is the head:
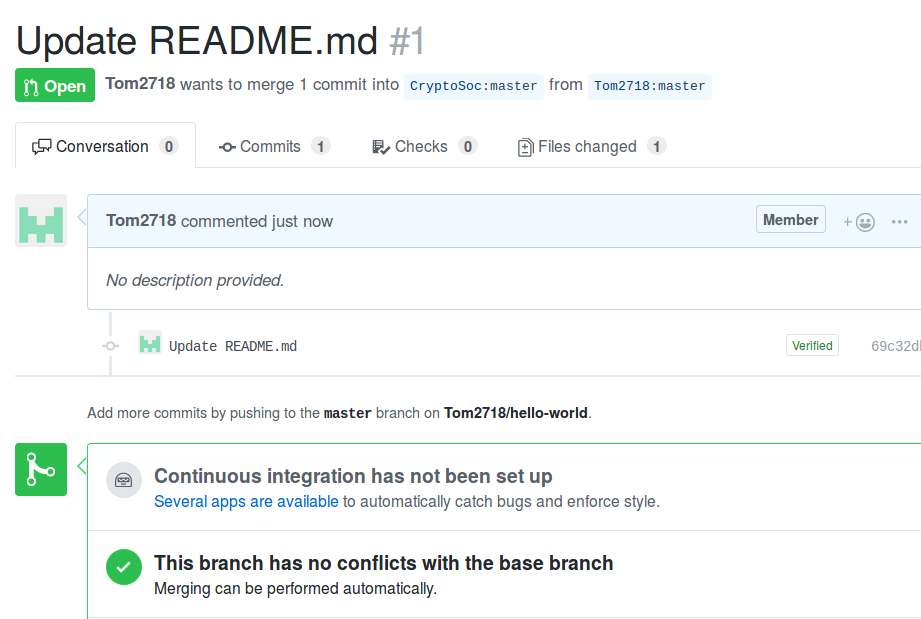
Once you click “Create Pull Request” you can add a comment describing your change and click “create pull request” again, you should be greeted with this screen. Here you can comment on the changes you’ve made and discuss with the author why you made them. In this case, one of the CryptoSoc team will merge your pull request soon. Hang tight!
Conclusion
And that’s it! You’ve learnt Git and made a contribution to someone elses repo using GitHub. Well done. In the next tutorial we’ll set up our development environment to better make use of these tools.